Contact card: the easiest way for your subscribers to save your number
Let your subscribers save your phone number easily by creating and sharing your Contact card.
By adding a Contact card to your text messages your subscribers can save your phone number to their contacts easily with an associated image and some additional information.
How to update your Contact card?
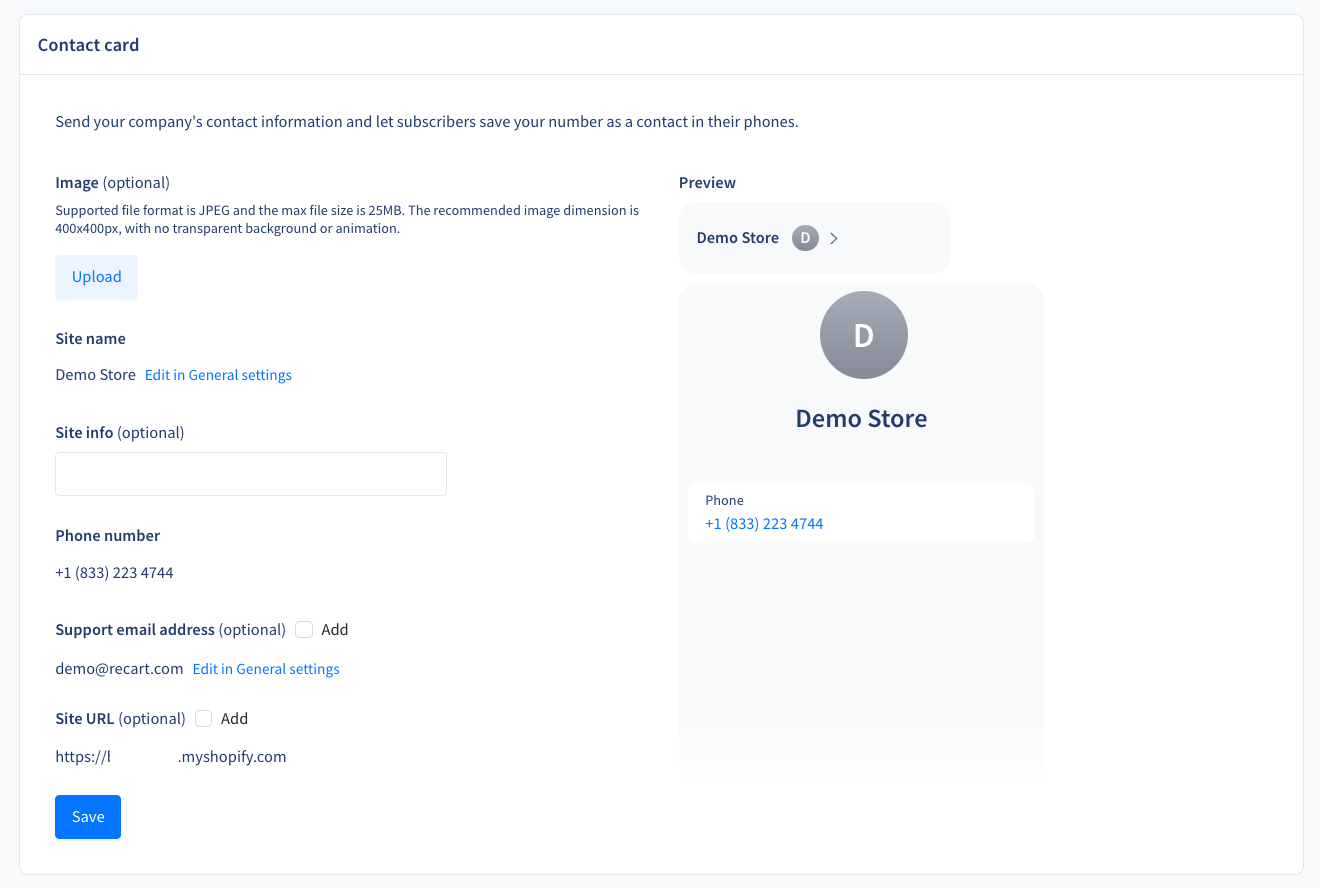
The Contact card will be created by default containing the Site name and the Phone number. To include additional information, go to your SMS Settings Page, and scroll down to the Contact card section.

What information can be added to your Contact card?
Required and added by default:
-
Site name
-
the site name is the name of your contact
-
it is automatically synced from your account
-
it can not be edited on the Contact card
-
you can modify it on the General Settings Page
-
-
Phone number
-
the phone number is also automatically synced from your account
-
it is the fixed number your business is sending messages from, it can not be edited
-
Optional:
-
Contact image
-
the format should be JPG, other formats are not supported
-
the recommended dimensions are 400x400px
-
the maximum size is 25MB
-
-
Site URL
-
the site URL is your store’s homepage by default
-
it can not be edited
-
-
Site info (Subheader)
-
The Site info is a short description that appears under your contact’s name
-
you can add a description up to a maximum of 50 characters
-
-
Support email address
-
the support email address is a company email address where your subscribers can reach out to you
-
you can add or modify it on the General Settings Page
-
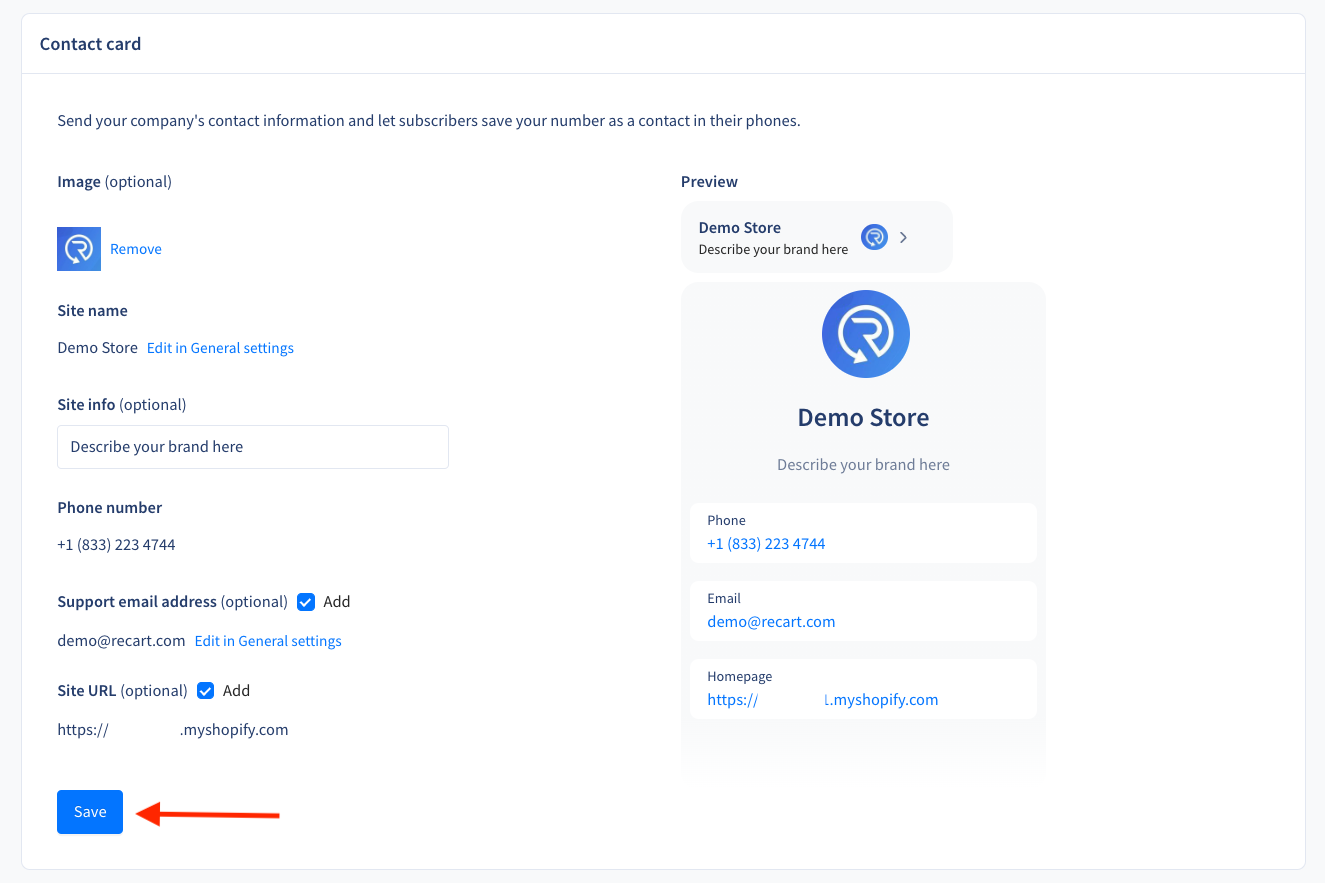
Once you added all the information you would like to include in your Contact card click on the Save button.

Editing the Contact card information
You can modify the information added to your Contact card anytime on the SMS Settings Page. The data will be updated immediately. Messages that are being sent after the modification will contain the updated Contact card information.
Adding the Contact card to your messages
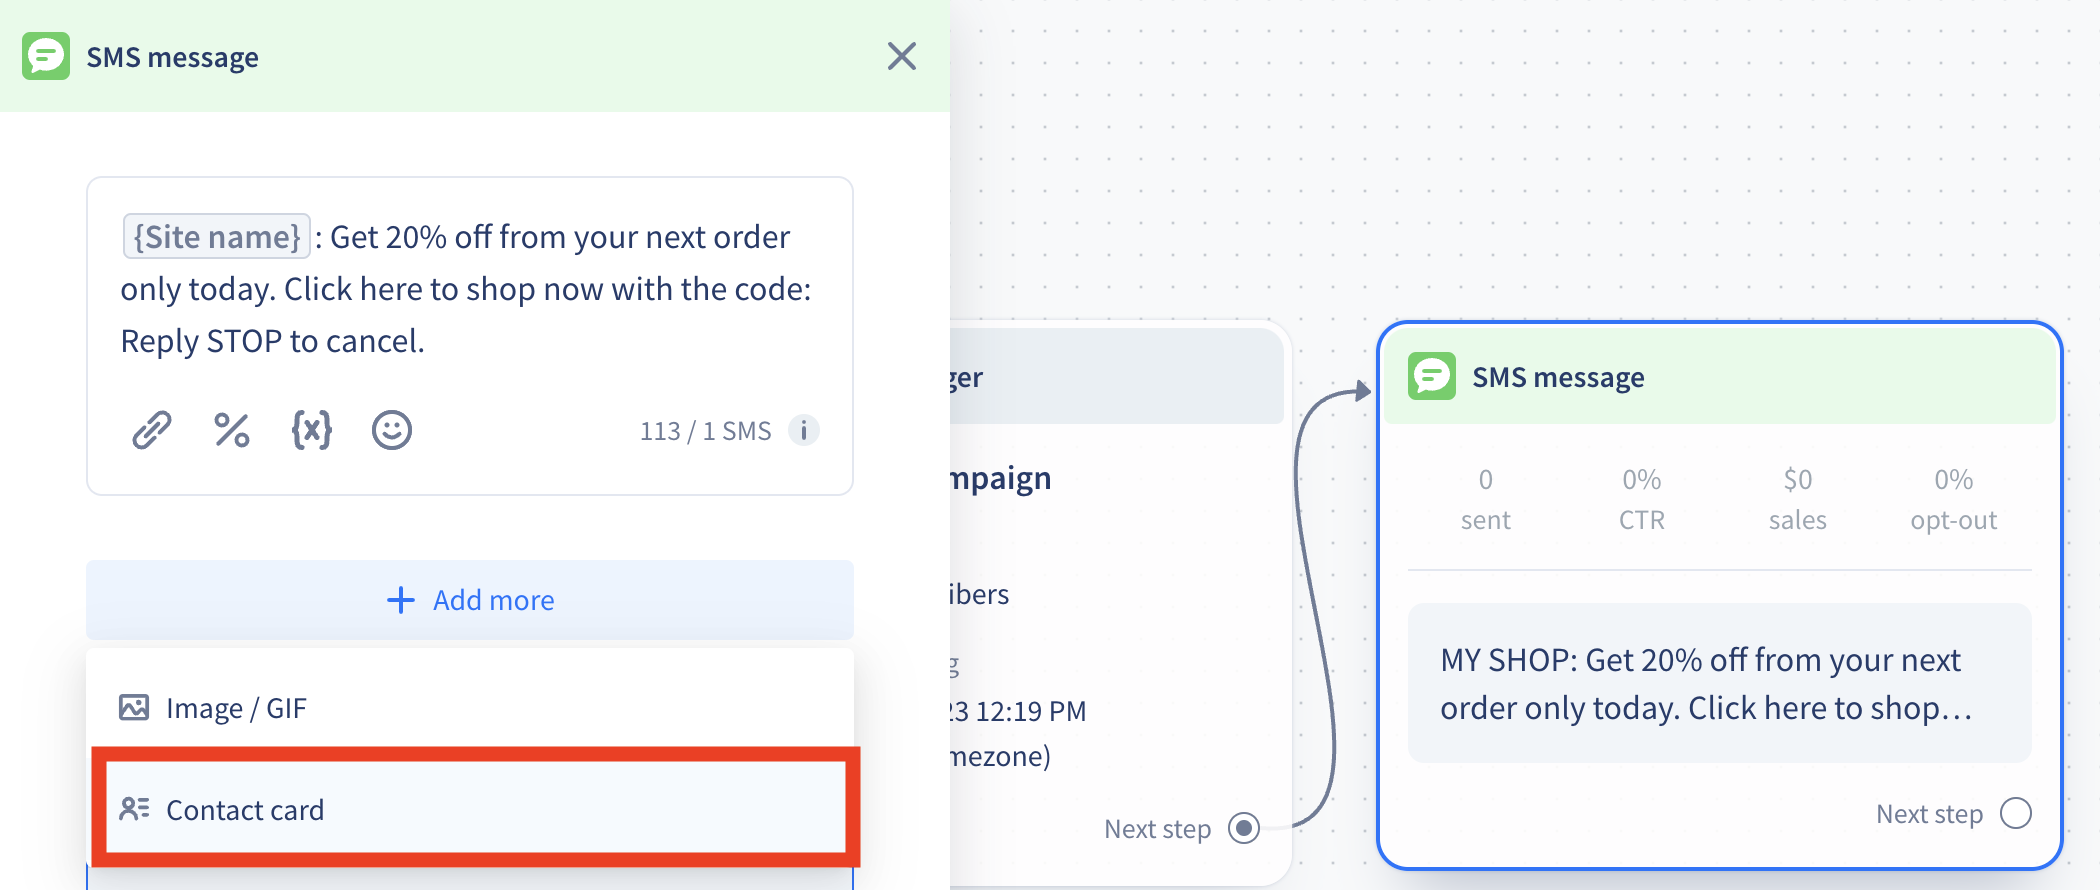
You can add your Contact card to any type of SMS message including Automated flows or Campaigns. Once you click on the flow item you want to add the Contact card to hit + Add more and select Contact card.

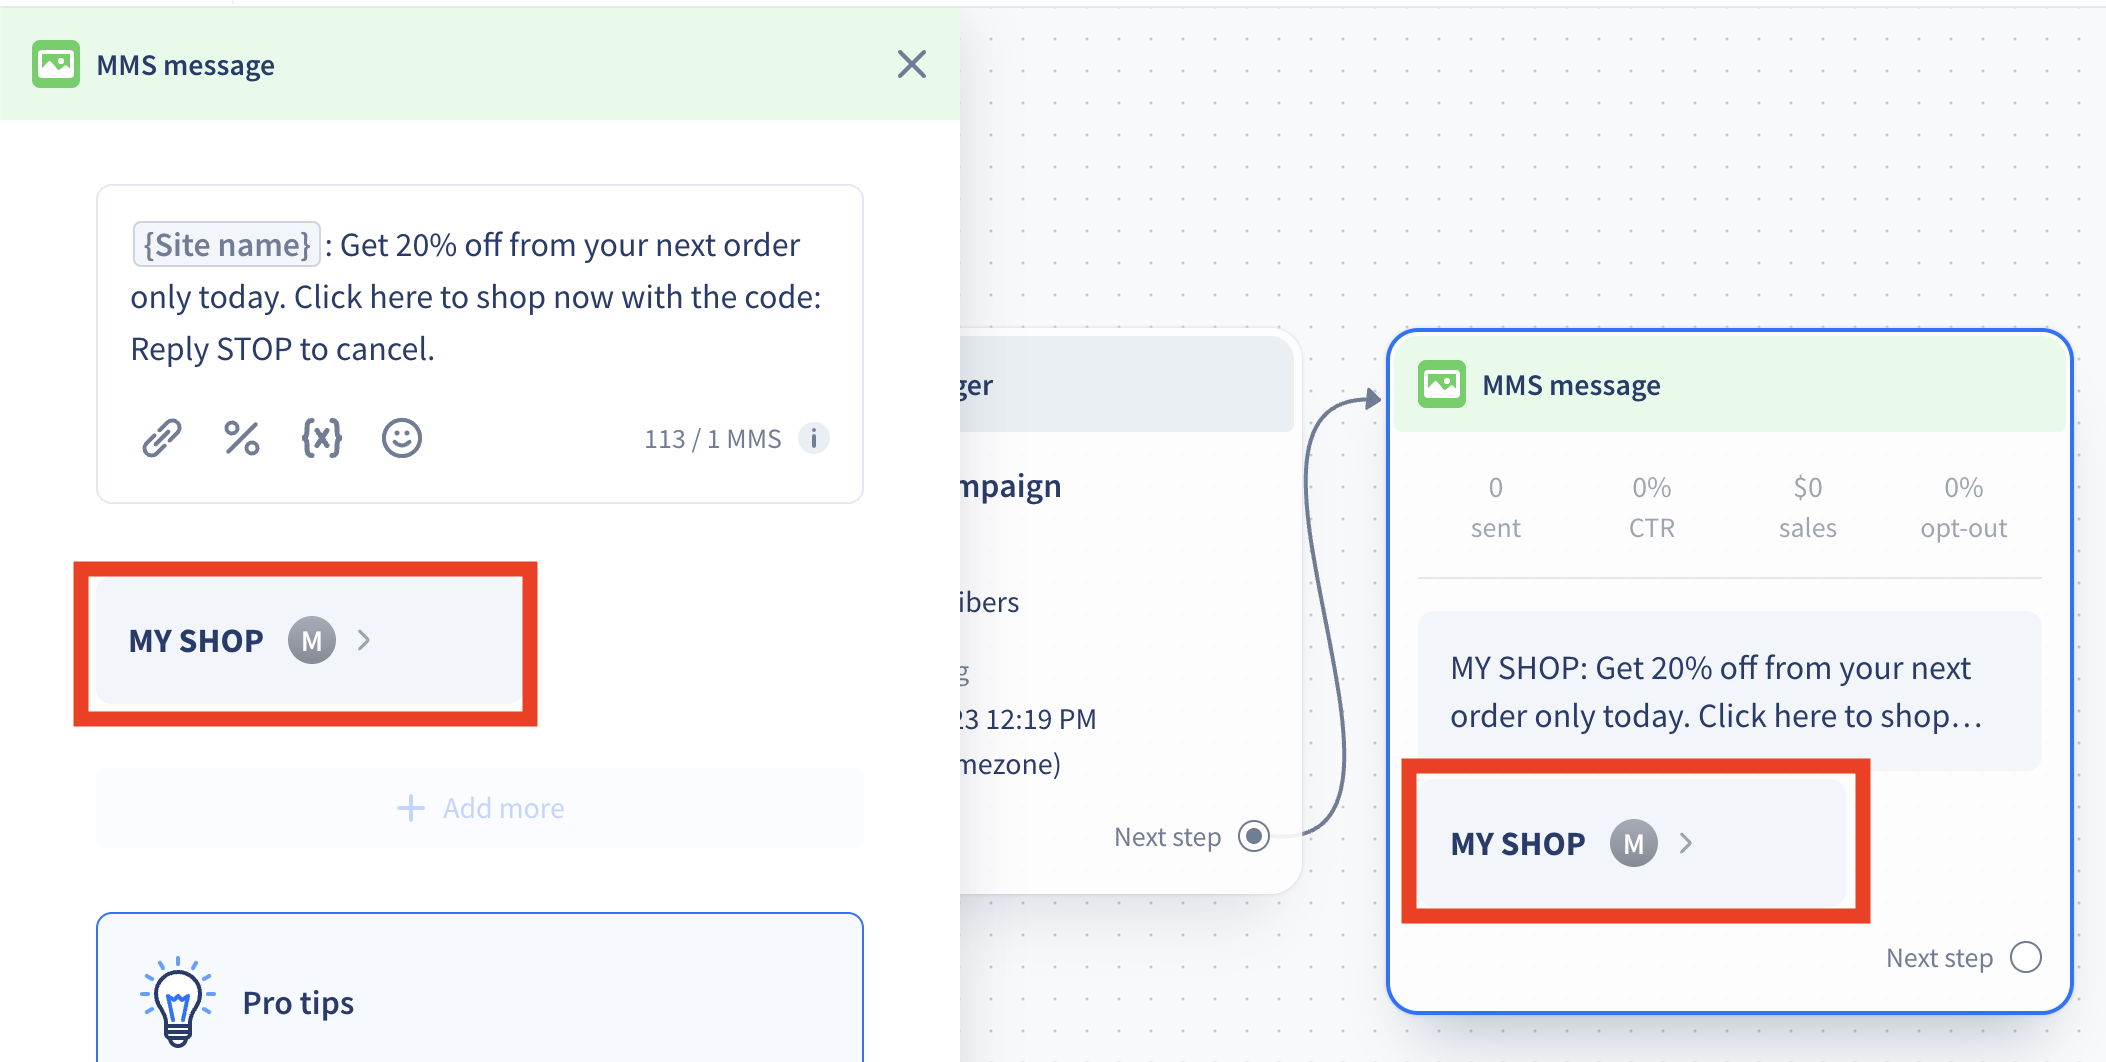
You will see the Contact card added to your flow item.

Note that once a Contact card is added, the message will automatically be converted to an MMS message. This means the MMS character limits apply to all messages containing a Contact card. Learn more about character limits in this article.
If you have any remaining questions, do not hesitate to contact the Customer Support team.