Table of Contents
- How to set up an SMS Campaign
- Message customization tips
- Campaign settings
-
Schedule SMS Campaigns according to your subscribers’ timezone
- Schedule or send your campaign
- Cancel campaigns
- Campaign statistics
Sending SMS Campaigns is the best way to promote your business, advertise your products, educate, and keep your subscribers engaged with your brand. To maximize your ROI we recommend sending a monthly range of 4-8 campaigns. If you are not convinced, check out this blog post about messaging frequency.
How to set up an SMS Campaign
-
Go to Campaign Flows, Click on SMS Campaigns, and click Create new.
-1.gif?width=688&height=362&name=ezgif.com-animated-gif-maker%20(1)-1.gif)
-
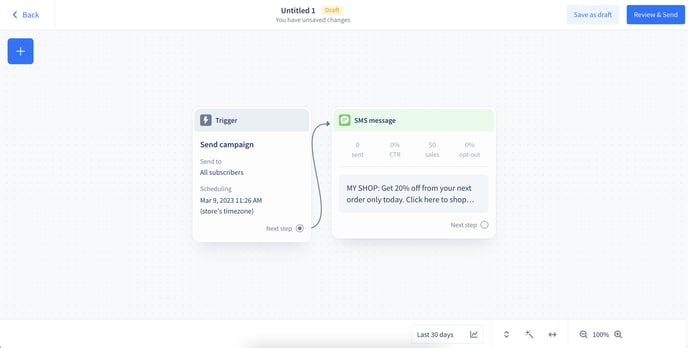
You will be redirected to the editor. Here you can customize the default message by clicking on the flow item itself and edit campaign settings by clicking on the Trigger item.
Message customization tips
-
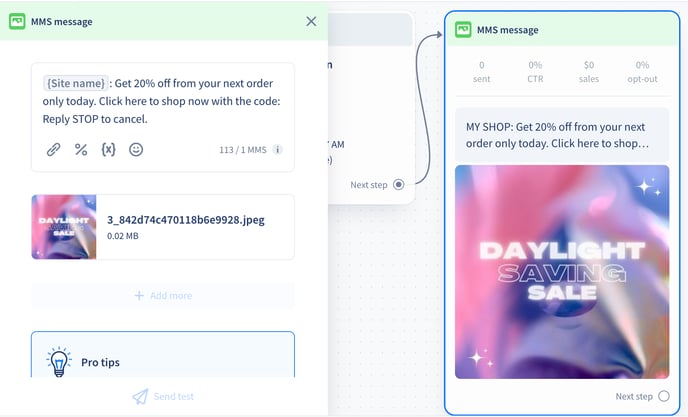
Make your messages more appealing by including images and GIFs, learn how in this article.
-
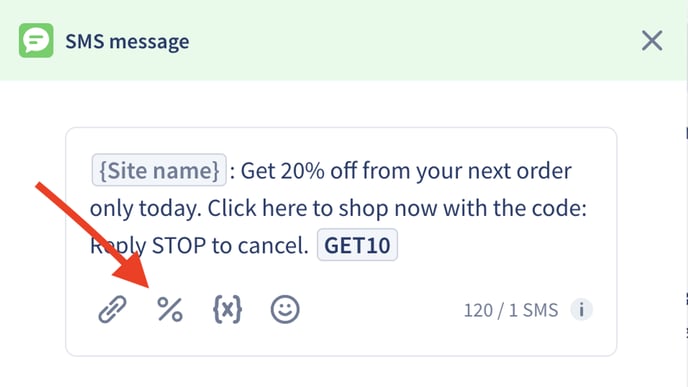
Add a discount code to incentivize your subscribers. You can either add a general discount, that is static for every subscriber or a unique discount code that is dynamic for every subscriber. This article explains how to add a general discount code, and this article explains how to add a unique discount code to your messages.
-
Add a link to your message to redirect customers back to your store.
-
To make sure your campaigns are compliant with text marketing regulations, keep the Site Name at the beginning of the message. In addition, we recommend adding the opt-out language at the end of every third campaign. You can learn more about Text Marketing Compliance here.
Campaign settings
-
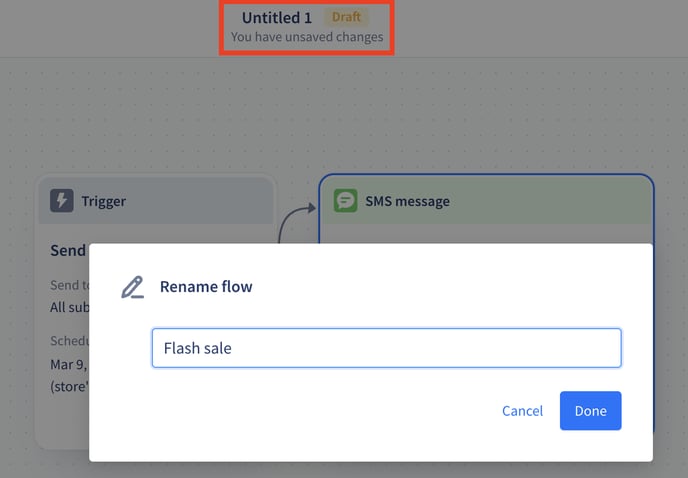
Give your campaign a name.
-
Use Trigger Selections to choose your audience. Read this article to learn more.
Schedule SMS Campaigns - Store & Subscribers’ timezone
Relative scheduling allows you to deliver a scheduled SMS Campaign message to your subscribers based on the subscribers’ local time zone. Meaning, if an SMS Campaign is scheduled for 3 pm, every subscriber should get the campaign at 3 pm in their local time.
-
Navigate to Scheduling by clicking on the Trigger selection of your SMS campaign
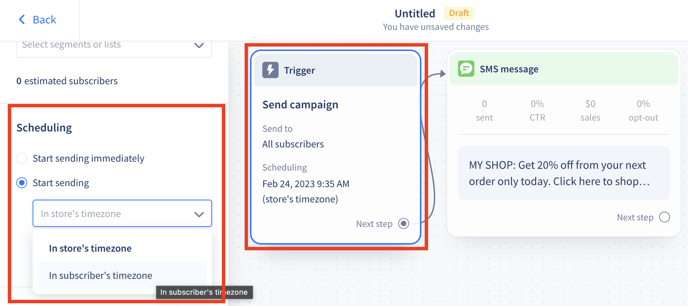
-
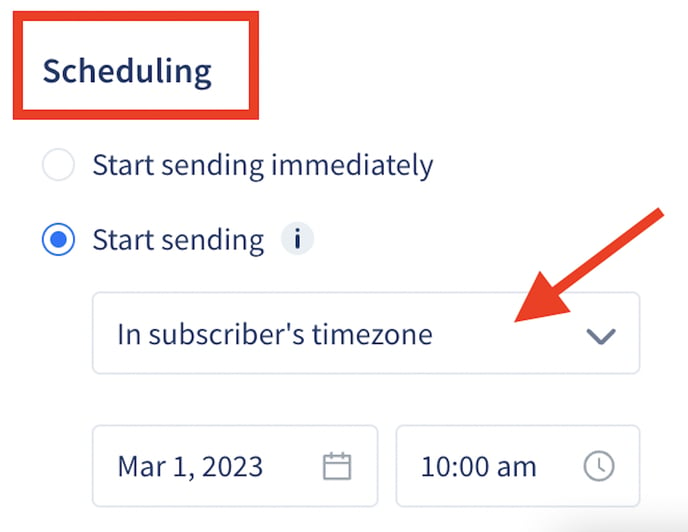
You can either start sending your campaign immediately or set the campaign to “Start sending”
- In your store’s time zone -the default setting (can be edited on the Settings Page)
- In subscriber’s timezone
👆 In this example, everyone will receive the SMS campaign at 10 am in their timezone.
Fallback
In some cases, the subscribers’ time zone can be unknown. Eg.: With keyword opt-in, we don’t have any information about the subscriber until they click a link in the message and we can connect them to a time zone based on their browser setting. In these cases, the messages will always be delivered in the store’s time zone!
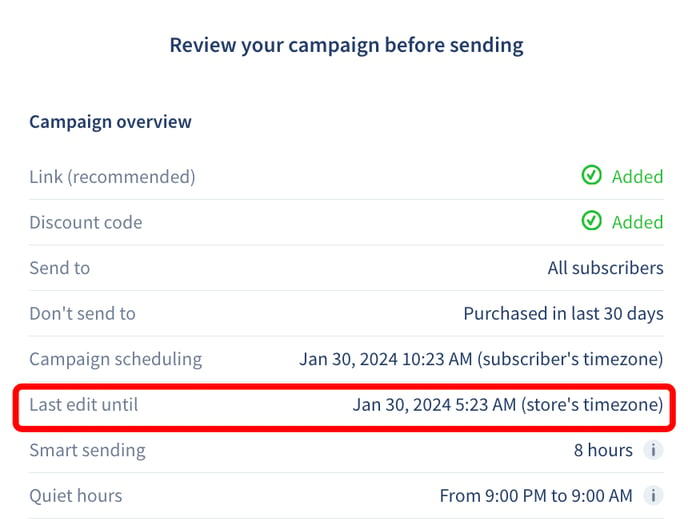
Last edit until - what does it mean?
On the summary popup, we display when is the last time a scheduled campaign can be edited.
-
The last edit is displayed within the store’s timezone.
-
We calculate it from the earliest considered time zone when the message will be sent and we add an extra hour to include the scheduling process on our back end.
What if the scheduled time is in the past in certain subscribers’ time zones?
There can be subscribers in time zones ahead of the store’s time zone. It can happen that at the moment of scheduling these subscribers should have already received the message in their local time. These subscribers will receive the campaign immediately once it’s scheduled.
There is no last edit option in these cases, as the sending starts immediately once the campaign is scheduled. Moving the cursor to the information icon on the summary popup warns the merchants about this.
Targeted Segments
If you are targeting specific segments and using relative scheduling, only those subscribers will receive the message who are members of the segment at the moment when the scheduling process starts in the system.
⚠️ So the latest time when a user can enter the segment and get the SMS Campaign is the same as the last edit time. ⚠️
Schedule or send your campaign
-
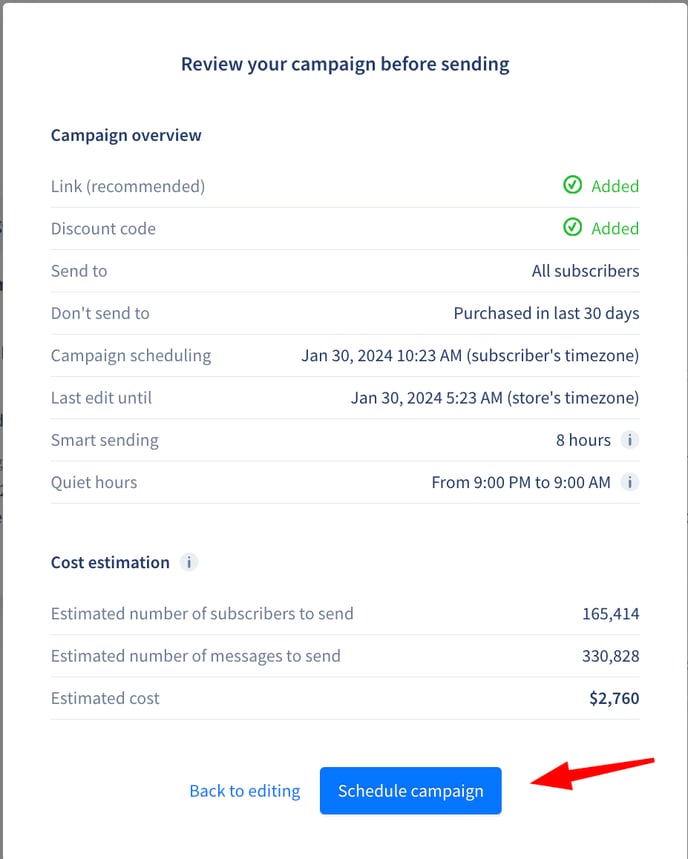
When your campaign is ready to be scheduled or sent, you will need to click on Review & Send button in the upper right corner.
-
Double-check the campaign data in the overview section and check the cost estimation.
-
If everything looks good, click on the Schedule campaign or the Send campaign button, depending on your previous sending setting.
Cancel campaigns
If you are in the process of sending a campaign, but realize that a mistake has been made, you still have the power to cancel your SMS campaigns.
It’s super simple:
- Click on the
three dotsnext to your campaign. - Hit the
Canceloption.
Keep in mind, that any messages already sent can’t be retrieved, but this will stop the rest from going out if you spot something off.
🚨 Once a campaign is canceled it cannot be edited or reactivated. You will need to duplicate it to fix the error and reschedule it.
Important: Canceling active campaigns
Campaigns can only be canceled from Scheduled, Processing, and Sending statuses.
- Canceling a Scheduled campaign will make the campaign a draft again.
- Other statuses will become Canceled.
Once a Campaign enters the Processing or Sending status, certain messages will have already been sent to subscribers and cannot be retrieved.
However, it is still feasible to halt the rest of the sending process.
We will make an effort to cancel the majority of unsent messages in the Campaign's Sending status.
🔥 Once the status changes to Sent, it becomes impossible to prevent the delivery of any messages, including both the initial message and all follow-up messages, within the campaign.
Campaign Statistics
Campaign Statistics are displayed separately for each Campaign on the Campaign Flows page.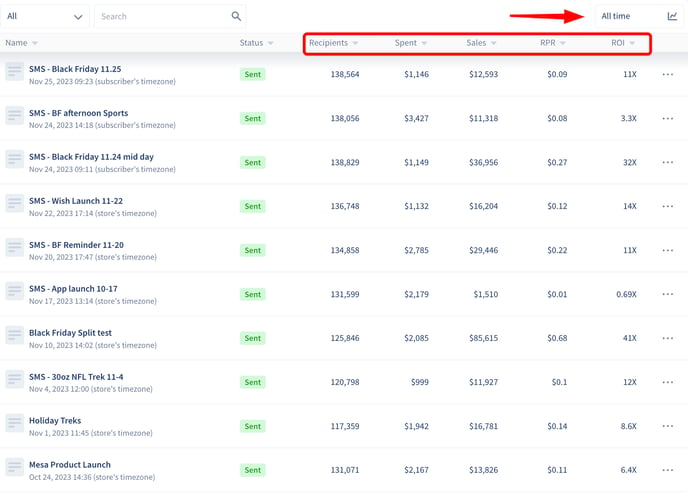
These statistics are accumulated for each message when the campaign has multiple message items. Let’s see what they mean one by one.👇
- Status - The Status will show the current state of the campaign. Campaigns can have 4 statuses which are: Draft, Scheduled, Sending, and Sent. Learn more about them in this article.
- Spent - The Spent column will show how much the campaign cost.
- Sales - The Sales column will show the value of all purchases that came from the campaign.
- RPR - The Revenue Per Recipient column shows the revenue generated from your campaign divided by the number of deliveries in the campaign.
- ROI - The Return On Investment column will show the ratio between your spending and the sales that were generated.
In case the flow consists of multiple messages, these statistics are accumulated. Per message statistics are displayed in the editor.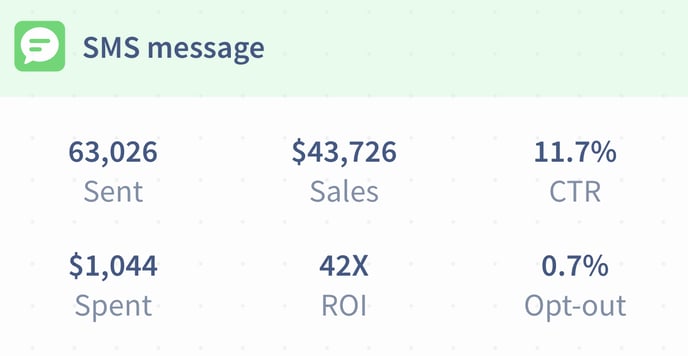
For each message, you can view
- Sent - The number of messages sent.
- Spent - The amount spent on the message.
- Sales - The value of purchases that came from the message.
- ROI - The ratio between your spending and the sales that were generated.
- CTR - The ratio between the subscribers who clicked on a link within the message and the total number of subscribers who received the message.
- Note: One subscriber’s click will count as 1 click even if there were multiple links within the message and the subscriber clicked on all of them.
- Opt-out - The percentage of users who unsubscribed after receiving the message. It is the ratio between unsubscribed users and all recipients.
If you have any remaining questions, do not hesitate to contact the Customer Support team.